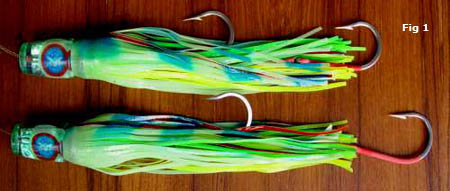


06: Rigging Lures
Between The Lines - Ch 05: Rigs
|
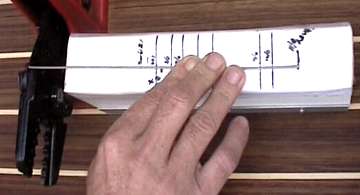
The following instructions, photos and video specifically show how to construct a Pakula Shackle Rig, however, the information and techniques can be adapted to any type of rig you wish. When making rigs it helps to do several of the same sizes at the same time. Repeating each task several times will make them much easier in the future. This page is video and image intensive. The text is essentially a guide in note form. Rigging 1Cutting the wire that is used in between the shackle and trailing hook to a specific length is helped by the use of a jig. (Vid 1)
The settings on the jig depend on the length of the crimps, loops, thimbles etc and where you wish to position the hooks. Traditionally the trailing hook has the point level with the tail of the skirt, however by having the wire longer and setting the hook as far back in the skirt as is legal according to the IGFA rules the success rates in secure hook-ups are significantly increased.
Rigging 2When putting the figure eight swage on the wire, give it a small nick which will keep it in place for further processing. (Vid 2)
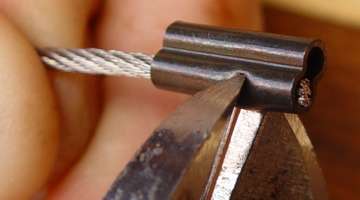
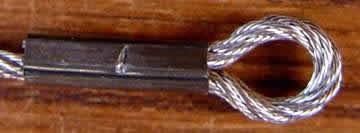
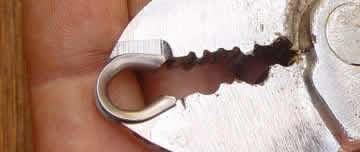
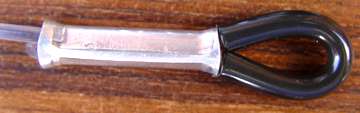
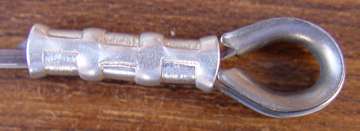
Rigging 3Thread the hook on the wire, pass the wire through the swage ready to crimp. As you crimp the swage, insert a spike which will not only keep the loops of a consistent size, it will, if you pull on the wire with a pair of pliers, make a round rather than teardrop loop. Note that when crimping wire the swage is crimped for its full length. The swage should end up being round and neat with no flairs on its ends or sides. (Vid 3)
Rigging 4Put another figure eight crimp on the other end, feed it back through the swage to form a loop. Nick the swage on the tag end side to keep it in position. Insert a slightly larger spike in size and shape the loop. Set the hook at the 60-degree angle, pull the wire uptight and crimp. It is not important if the angle is not quite accurate as it can be easily adjusted later. (Vid 4)
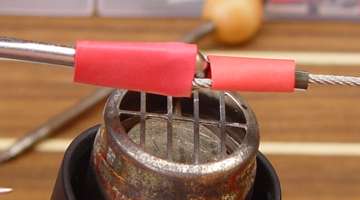
Rigging 5Shrink tubing is positioned to stop the hook tangling on the wire loop. The shrink tubing is also positioned to support the piece on the hook eye. Shrink tubing also adds a flash of colour to the hook and is great for forensics as it marks easily. You can tell from the scratches and teeth marks what species of fish you may have missed on the lure, and how large it was, by the distance the marks are apart - a great topic for discussion over a drink at the end of the day's fishing. (Vid 5)
Rigging 6Thimbles are open when you buy them. Before using them they should be closed as they may cut nylon if they rotate. (Vid 6)
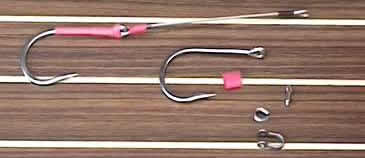
Rigging 7The rig is now ready for assembling. Put the closed thimble on the shackle. Then slide the loose collar, which is a piece of heat shrink, on the wire. Note the collar should remain loose. Next, feed the second hook through the loose collar. Fit the shackle to the hook eye and loop. The shackle pin should be positioned at the back of the hooks. Check that both the hook and wire swing freely on the shackle. At this stage, the hooks should be checked and if necessary touched up with a file, or if you wish, finish the hook sharpening with a fine stone or hone. Then check the angle of the hooks. If they are not correct they can be adjusted by repositioning on the shackle if they are back to front. If the hook angle is close to being correct, the wire can be twisted for fine adjustments. (Vid 7)
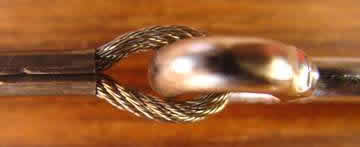
Rigging 8The leaders are now cut to length or were prepared earlier. Note that under the rules the leader length includes all loop and joins and extends to the end of the rig or lure. The swage, which should be the correct size for the leader and fit snugly, is threaded onto the leader then the chafing tube, which should fit tightly, is threaded on, then the leader end is passed back through the swage. To make pulling the leader tight easier, pull the chafing tube down to the crimp on the tag end. To finish pull the leader to tighten the loop and crimp the swage. Note that when crimping nylon the swage remains flared at both ends to prevent the swage cutting into the nylon. (Vid 8)
Rigging 9To finish off, the leader is passed through the leader hole at the face of the lure, then the rubber washer, which protects the back of the lure head, and swage is threaded on. The leader is then passed through the shackle, over the closed thimble and back through the swage. As the leader is pulled up tight ensure the thimble is sitting evenly and the leader sits snugly in the thimble groove before crimping. To finish off, simply pull the leader up through the lure, position the rig in the back of the skirt, checking that the hooks are sitting at the correct angle of 60 degrees. (Vid 9)
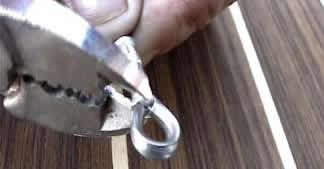
Hand CrimpingCertainly, you may not have crimping bench presses as shown and therefore you may use hand crimpers. To crimp swages properly, first crimp the end of the swage on the inner side of the leader, then the other side. To finish off, turn the swage over and crimp in the middle. This will stop the swage from bending. By crimping in this manner you will also tighten the loop on the thimble of the chafing tube. (Vid 10)
RepairingWhen you repair gear or make a mistake in rigging you can save the items such as chafing tubes and thimbles by cutting the swage just above the item rather than trying to cut the nylon next to the crimp. (Vid 11)
|